The Easy Way With Pictures
Hosting an Unifi Controller in the cloud is a great way to centralize your Unifi network, especially you manage multiple networks. However, there are quite a few steps and, they are constantly changing due to updates from the various vendors who must all work together in order for this to work. In fact, this is the reason I’m writing this blog. There are already how-tos out there on how to do this, but none of them work. So I made a new one. If it helps you, please leave a comment down below, I appreciate any feedback and love to stay engaged with you guys.
Firstly, my instance has been set up using Vultr hosting. Vultr hosting offers competitive pricing for a VPS server, but there are many other providers if you want to go another route. Two things that you need to take into account if you use Vultr though:
- The first is that Vultr is missing some core components on a fresh install (Java & MongoDB) so we’ll manually install them
- The second is that the base server only uses an IP v6 address. Make sure to purchase at least a VPS with IPv4 capability
- This is for 5.10.26 of the controller software. More recent updates may change things
- I will go over how to set up a Domain name as well
Setting up your server in the cloud
Creating the server
We need to set up and create a server. Create an account at Vultr and set up 2FA (I know, but it is important).
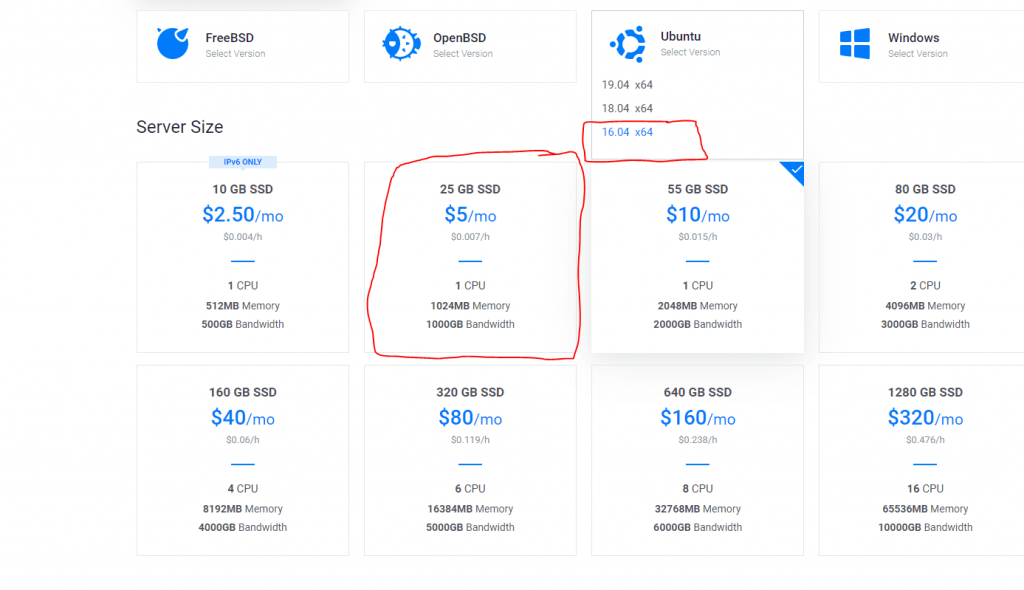
Select the 16.04 version of Ubuntu and be sure to pick the 25GB SSD option or better (the setting with the red square should allow you to manage about ~500 devices) the more RAM and CPU speed, the more clients you can manage. Ubiquiti has stated that there is no hard limit software-wise so if you can afford a little extra, do it!
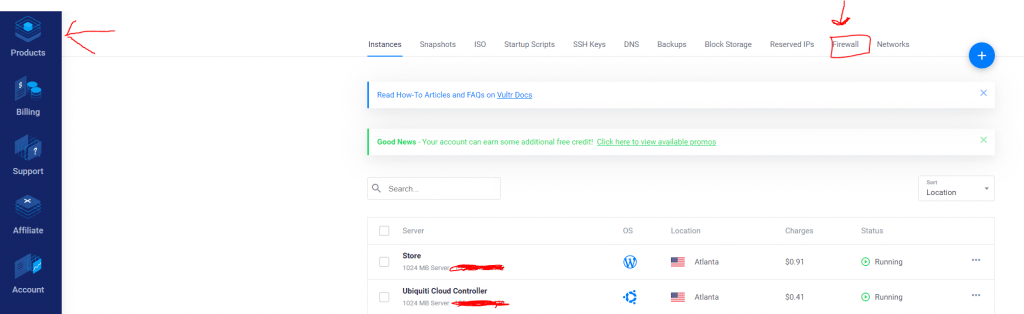
Okay, now that we’ve started the server we need to set up the firewall on Vultr. There are a few steps here. The first is to go into the products tab on the left-hand side of the toolbar. Click that and it should bring up your server.

Setting up the firewall
Then, click the firewall tab and click the blue plus button so you can add firewall rules. The firewall rules are important because it allows your controller to talk to your devices.
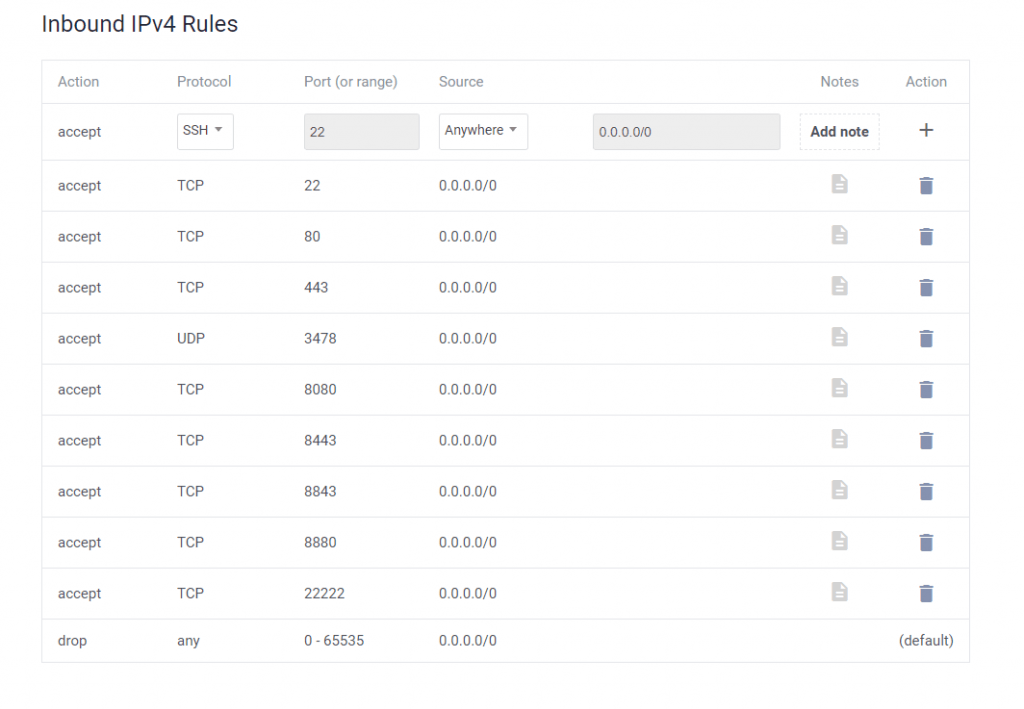
| Action | Protocol | Port |
| accept | TCP | 22 |
| Accept | TCP | 80 |
| Accept | TCP | 443 |
| Accept | UDP | 3478 |
| Accept | TCP | 8080 |
| Accept | TCP | 8443 |
| Accept | TCP | 8880 |
| Accept | TCP | 22222 |
| Accept | TCP | 0-65535 |
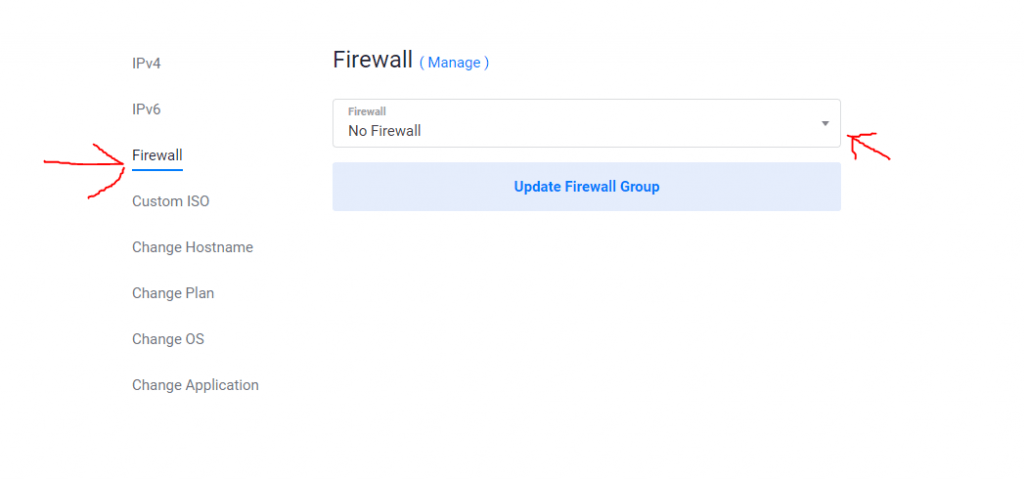
Now that we’ve set up the firewall rules, we have to apply it to the server you’ve set up. You can do this by clicking your server instance click on the settings tab and then follow these red arrows. Select the firewall settings we just setup.
Logging into the server via SSH
Download Putty & Login to the Server
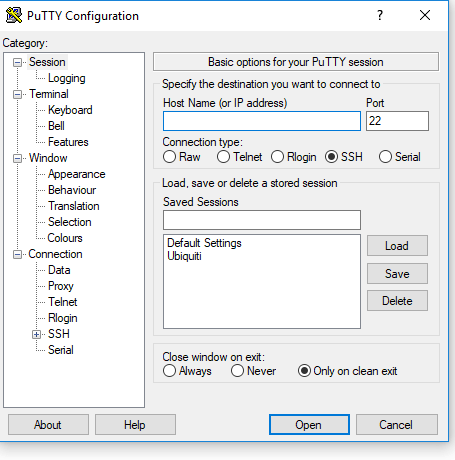
There are two options here. You can use the one on Vultr’s website, or you can use Putty. If you don’t already have it you can download it here. Putty is better because you can copy and paste. Honestly, just use Putty. If you’re just getting into networking your gonna need it anyways.
Logging into the server
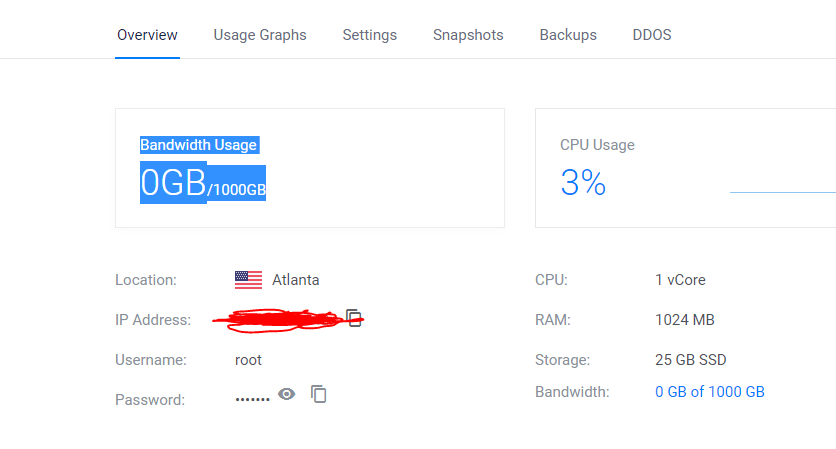
We need the IP address and the password to login to the server. You can find it on Vultr’s website in the Overview tab of the server instance
Open up, Putty. You will see a login bar where you will put in the IP address ignore the “security warning.” Then type in “root” for your username. Now here’s the trick in Putty for you newbies, you need to copy the password from vultr first and then with your cursor in Putty “right-click” to paste the password. Putty does not notify you or give you stars when it’s been pasted, but it’s in there, Now push enter.
Great! You’ve logged in!! You should see a screen resembling this:
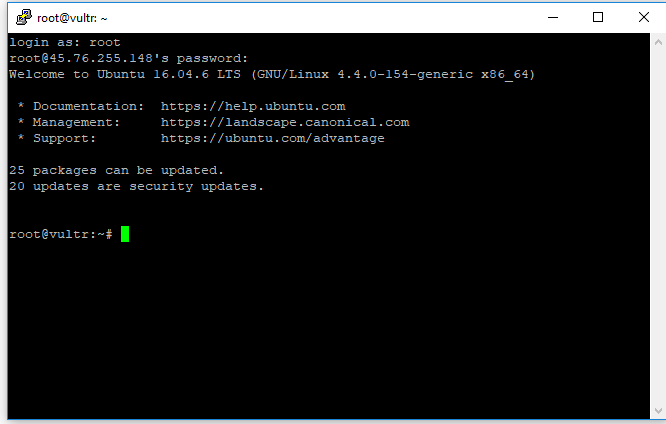
You have now logged into the server congratulations. In this system, you are now god. You have root access. The next step is to install all the necessary components. From here on out I want you to copy and paste the code that I give you using the same technique that you learned from above.
Installing the files: Here comes the code
Installing MongoDB
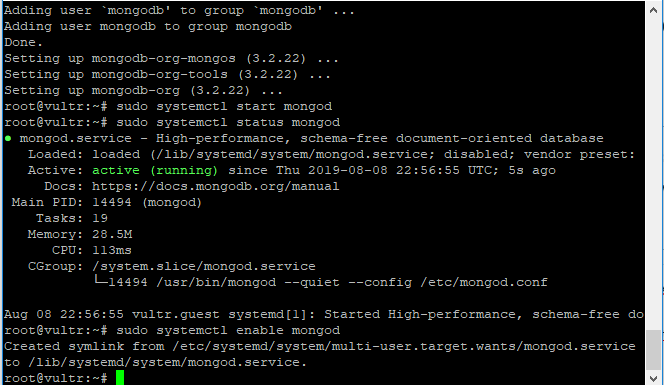
Pay attention to the output of the console; it will ask you some questions on if you want to continue. Put in Y for yes to continue. There will be a point where the MongoDB service will run. Push “q” to quit out of the service to bring you back to console input
sudo apt-key adv --keyserver hkp://keyserver.ubuntu.com:80 --recv EA312927

echo "deb http://repo.mongodb.org/apt/ubuntu xenial/mongodb-org/3.2 multiverse" | sudo tee /etc/apt/sources.list.d/mongodb-org-3.2.list

sudo apt-get update

sudo apt-get install mongodb-org

sudo systemctl start mongod

sudo systemctl status mongod
After installing the code, you should see green text in the output like below. If you don’t see the green text, something went wrong and you need to restart the process. If you can’t figure it out, leave a comment below.
Installing Java 8
Heres the rub, Ubiquiti still hasn’t updated the controller software to run on Java 9, so we have to install an older version of the software. Once again pay attention to the output, it will ask you to press enter. Here’s the code:
sudo add-apt-repository ppa:webupd8team/java
sudo apt-get update
sudo apt-get install oracle-java8-installer
sudo apt install openjdk-8-jdk
java -version
You should see this output for the java version command. If you do not something went wrong:

You need to configure the time zone for the controller. DO so by entering this command and following the on-screen instructions
sudo dpkg-reconfigure tzdata
Installing the Unifi Controller Software
Sweet, we’ve set the stage now we need to jump in. We’re going to install the controller software now and make sure it runs as a service. Make sure to follow the prompts and press N to verify and Y to install! Stay tuned for the code!!
echo 'deb http://www.ubnt.com/downloads/unifi/debian stable ubiquiti' | sudo tee /etc/apt/sources.list.d/100-ubnt-unifi.list
sudo apt-get update
sudo apt-get install unifi
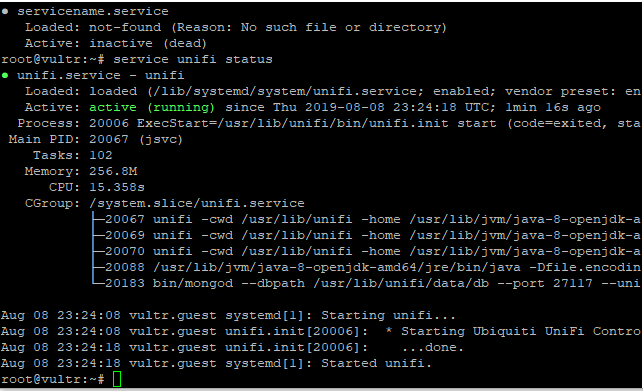
service unifi statusAlrighty, now make sure you see green text to verify that the Unifi service is running. If you see green, you’re golden!! Push q to exit to bring you back to console
Registering the Domain for your controller
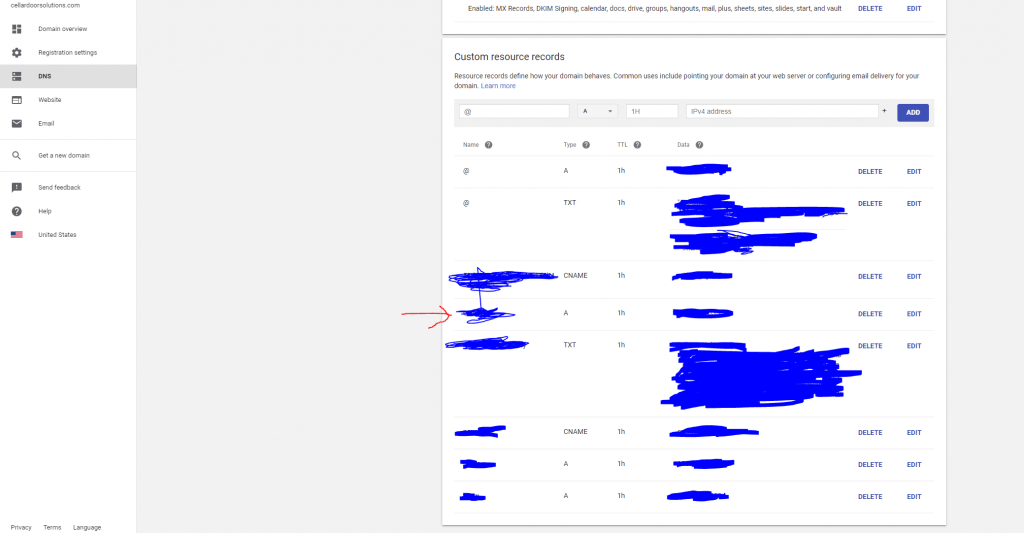
Okay, in order for us to secure the controller and encrypt the traffic we’re going to need HTTPS, which means you’re gonna need a domain. I don’t want to dive in deep here, but your best bet is to either piggyback off of a domain you own and create a subdomain OR just buy a new one. Make sure to go into your DNS records and forward your domain’s records to your server. I’m going to enclose a screenshot on how to do it using google’s domain, but they’re all similar. Where the red arrow is where I added my subdomain. I added an A record and pointed it to the IP address of my server hosting the controller software. When you save the record, it may take some time for everything to update (an hour or so) before you can access it through that domain.
Accessing the controller software through the cloud
now its time to log in to your fresh server. Type HTTPS://[server IP]:8443 . Now Chrome will give you a big fat security warning when you sign in. Ignore it. Click advanced setting and continue. Stupid Chrome.
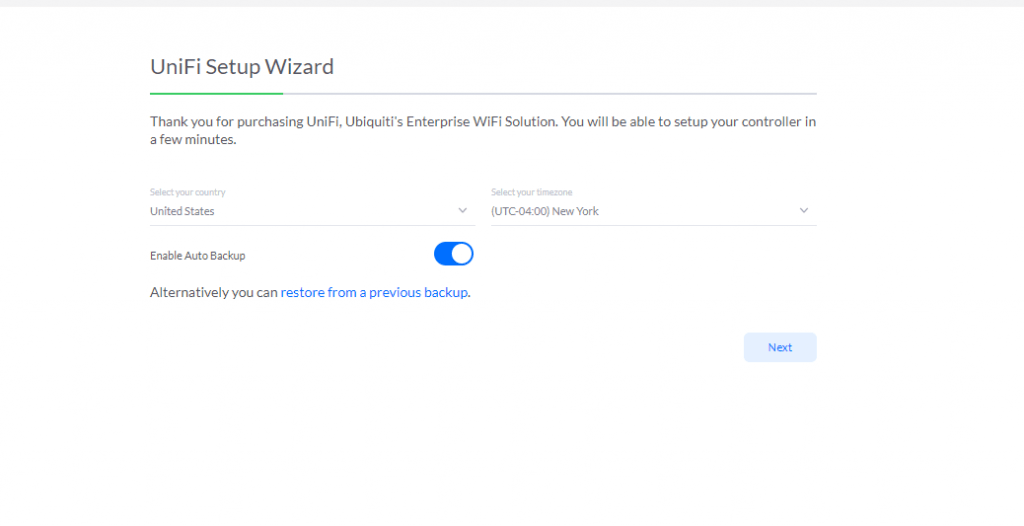
We’re in!! Sweet deal. Now I’m not going to delve in deep here. You’re going to setup the controller just like you do on any other type of install. Just follow the instructions, remember your passwords, and keep moving.
Setting up your HTTPS:// domain using let’s encrypt
Thank the lord for the Electronic Frontier Foundation! Before them https cost a fortune, now it’s free!! But we have to set up it up on your server. I’m gonna dump some code on you, but it’s worth it.
sudo add-apt-repository ppa:certbot/certbot
Press enter
sudo apt-get update

sudo apt-get install python-certbot-apache -y
The next step is going to be generating your certificate from Lets Encrypt. You need to append your domain name after the code.
sudo certbot --apache -d [YOUR DOMAIN URL GOES HERE DO NOT INCLUDE HTTP (IE. google.com)]
Okay, Lets Encrypt is going to give you some options. Make sure to input your email address and follow the onscreen instructions. Press 2 for domain redirect.
Setting up the Let’s Encrypt Script
A much smarter guy than me came up with this wonderful script to automate the rest of the process. All we have to do is change a few details in the code and Whala! SSL is done. Stay with me here we’re almost done
sudo wget https://raw.githubusercontent.com/stevejenkins/unifi-linux-utils/master/unifi_ssl_import.sh -O /usr/local/bin/unifi_ssl_import.sh

sudo chmod +x /usr/local/bin/unifi_ssl_import.sh
Okay, now we need to open the text file to modify the settings. We’re going to use the built-in editor to do that.
sudo nano -w /usr/local/bin/unifi_ssl_import.sh
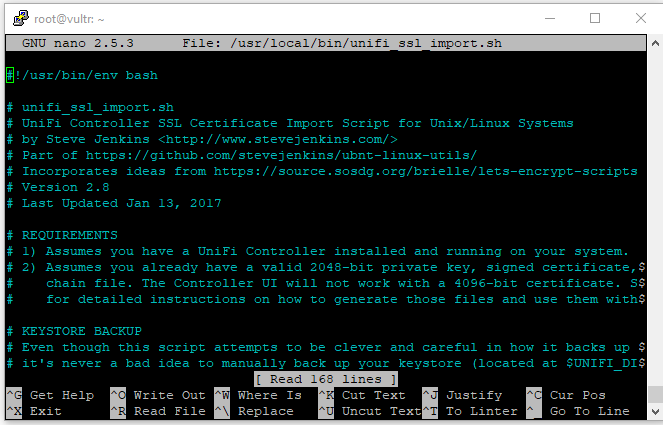
If you see this we’re in. I want you to push the down cursor until you the line that says UNIFI_HOSTNAME=hostname.example.com and modify it to your domain that you set up. It should be like: UNIFI_HOSTNAME=YOURHOSTNAME.COM
Press enter
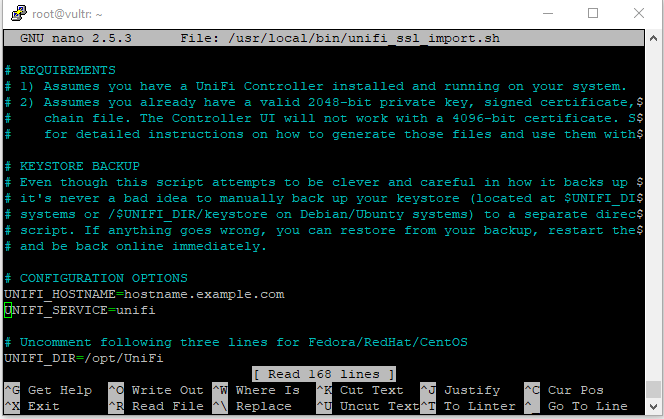
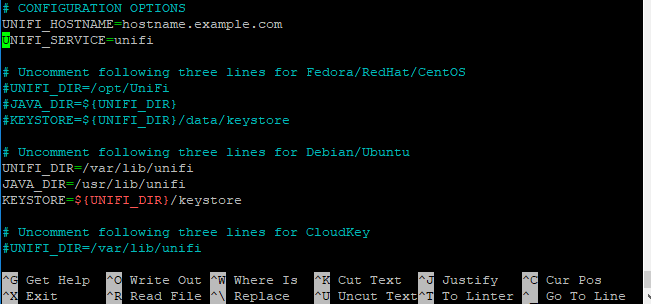
Scroll down again until you see the UNIFI_DIR line. You need to put a # sign in front of this text to comment (basically tells the computer not to read this text) out this. DO THIS FOR ALL THREE LINES
Once that’s done you need to uncomment the Debian/ Ubuntu lines since our server uses that OS
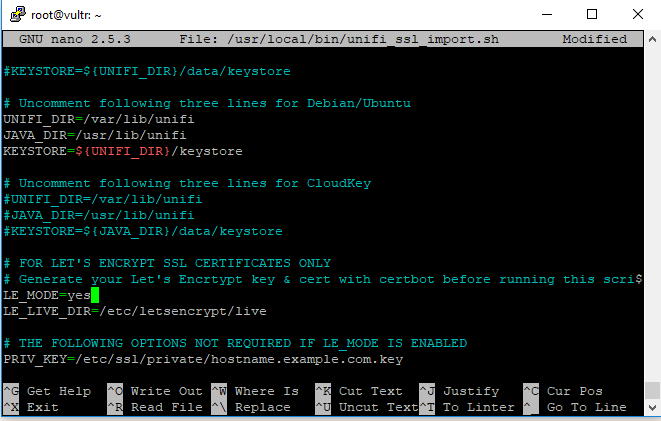
One more thing, scroll down to LE_MODE=no. We want to change that to YES because we’re using Let’s Encrypt!!
Okay, we’re done editing. We just have to save the file. Press CTRL-X on your keyboard. It’s going to ask you to save the file. Push y for “yes.” It will then ask what you want to name it. JUST PUSH ENTER, don’t change the file name
Now we need to run the script using this command:
sudo /usr/local/bin/unifi_ssl_import.sh
Awesome, everything is set up on the server end. Now we need to configure the AP’s to talk with your server
Setting up your Access Points to talk to your server Known as “Set-inform”
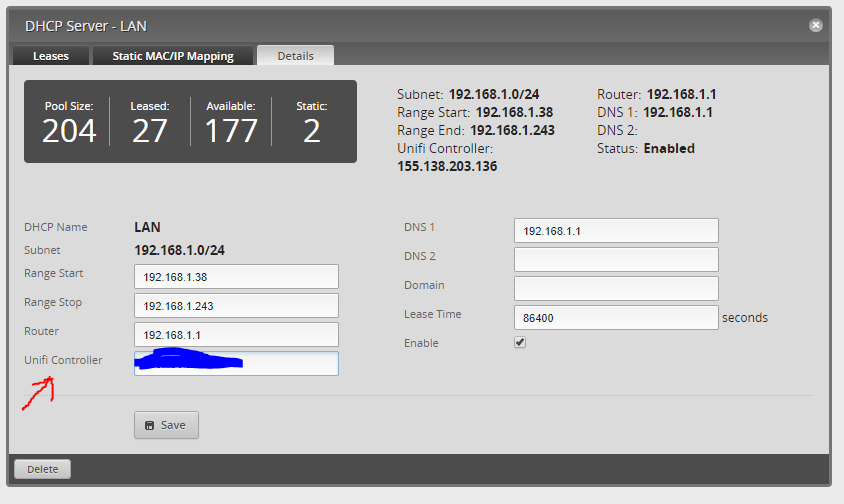
Unifi devices are set to try and contact a server on a local network. You need to program them to instead talk to your server. The easiest way is if you already have an Edgerouter. You tell it to use DHCP Option 43 to redirect the traffic to the controller. You need to login to your router and go to the services tab. There should be something called LAN under the name list (depends on how its setup). Click the actions tab on the right side and go to view details. Under the “Ubiquiti Controller” box put in the IP OF YOUR SERVER. Do not use HTTP or anything just the IP.
Boom, you should see your AP’s in your Ubiquiti controller. They’ll show up as pending adoption. If not hard reset your APs by using a paperclip. You need to hold the paperclip in for about 10 seconds for it to reset. Be careful, though! Unifi devices don’t like to be turned off when booting. They’re kinda finicky, just a warning. So take your time.
If You Don’t Own an Edge-router there are some other ways
- Most routers have a way to setup DHCP option 43, use some Google-Fu and do some research on it.
- You can also manually change the setting using Putty by connecting to each individual access point
- You can use this really cool chrome app that lets you connect to the Access points through the browser. Open the App up and select the “Unifi Family” button. Your AP’s will show up if they’re on and connected to your network. From there, you can manually change the “set-inform” from within the app. Change that to your domain you setup
- Ubiquiti has done a lot of work in making this step easier. They have a great write up on their website about how to do it.